Using the Admin | Adding a Point | Editing a Point | Adding a Category
Your PointsMap will have it's own sub-domain name. You can link to your sub-domain from your existing website and use the name in printed materials or advertising to point visitors to your PointsMap. PointsMap can also be "embedded" within your website as an hosting option as well allowing visitors to use your PointsMap without ever leaving your website.
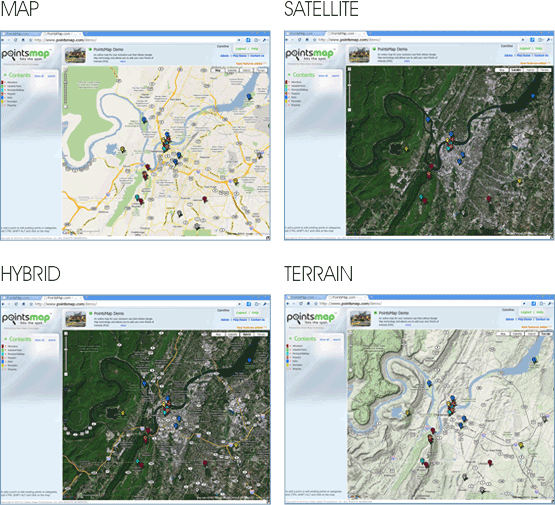
PointsMap uses Google map technology and maps so we can zoom and pan around the map. We can also quickly change between the various types of maps as we explore the points. We can control the initial map view and zoom level of your sub-domain and set your default map for your sub-domain to the streets map, satellite map, hybrid, or terrain map.
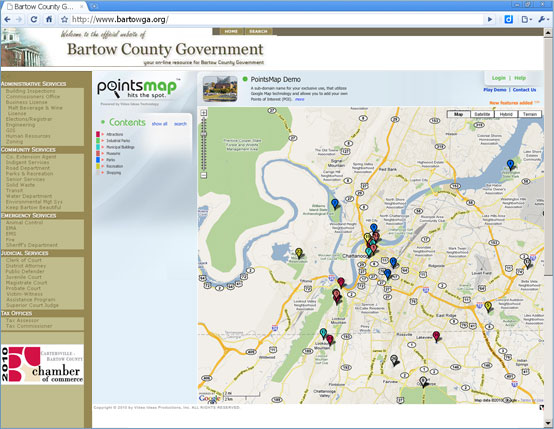
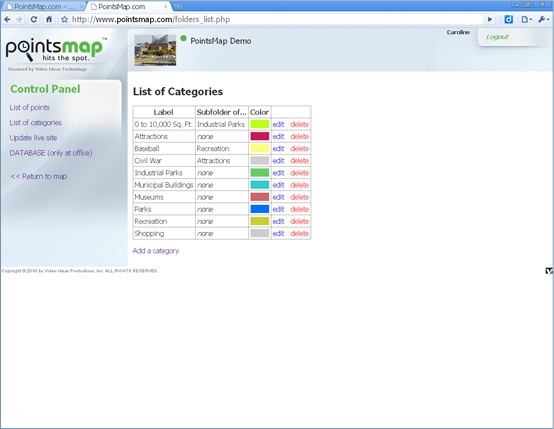
As we roll over the points on the map we see a thumbnail photo of the point. The points are color coded as to type and sub-folders are created in the table of contents for these points. Sub-folders are created by you as an Administrator, which permits you to create your own categories of points. Multiple levels of folders can be created allowing you to easily categorize your points.
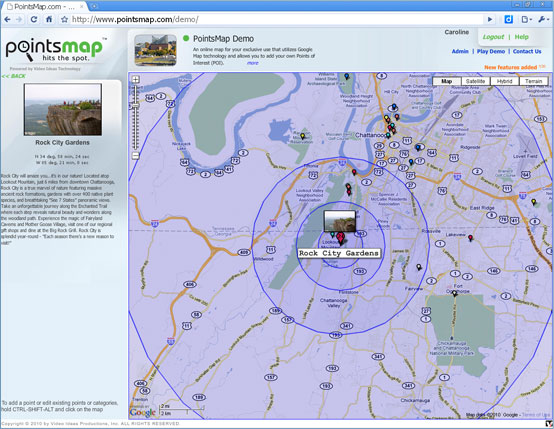
Clicking any point on the map brings up information about that point and highlights that point by making all the other points on the map smaller. This information is inserted by the administrator, or a password protected user, and can be added to, changed or modified at anytime.
If there is a photo for the point you can CLICK on the photo to enlarge it. In some cases their may be multiple photos uploaded for the point - if so you will see a NEXT button and you can navigate forward and backward through the uploaded photos for the point.
You also see the GPS coordinates in case the location is "off the beaten path" as it could be in a park, wildlife preserve or undeveloped site. The GPS coordinates can be turned on or off in the control panel. You can control the display of the GPS coordinates down to seconds for precise locations, or just to minutes for generalized location information. This might be useful when you did NOT want to reveal the exact location to the general public for fear of vandalism or the point you are marking could be on private property or have restricted access.
Control clicking on a point on a PC, or Apple clicking on a point on a MAC brings up a distance display. By moving the mouse over any location on the map, at any view level, the mouse info displays the direct line of sight distance in miles from the selected point to the mouse location.

- Login using your Username and Password
- A new ADMIN button appears
- From this Admin you can:
Add, Edit or Delete a Point
Add, Edit or Delete a Category
Update live site (to update the map to reflect your changes)
Return to map

- Login using your Username and Password
- A new ADMIN button appears
- Click Admin and select Add a Point
- You can then Enter the Address or Click on the Map on the exact location
Entering the address automatically locates the point on the map
- Click Add a Point to continue
or
- Hold down Shift, Control and Alt and click on exact location the map where you want to add the point
(Use Shift, Option and Apple on a Mac)
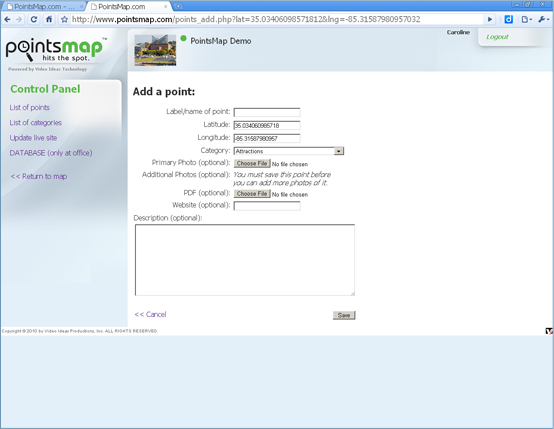
- This opens the Add a Point interface in the Control Panel
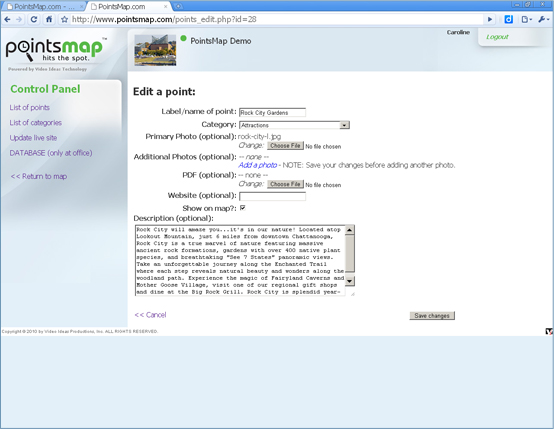
- Enter the Label/name of the point
- The Latitude and Longitude where you clicked on the map is automatically entered for you
- Select the Category and Sub-Category
(You can move the point later if you have not created the appropriate category before adding a point)
- OPTION - Add a Primary Photo by Browsing to the photo
- OPTION - If you want to add ADDITIONAL PHOTOS click SAVE to add the Add a Photo option
- OPTION - Click Add a Photo to add additional photos
- OPTION - Add a PDF by Browsing to the PDF
- OPTION - Enter a website link (include the www.)
- OPTION - Enter a Description for the point
- Click SAVE
- Click Update live site
- Click Return to map

- Login using your Username and Password
- A new ADMIN button appears
- Click Admin and select Edit Existing Points
- Click DELETE to delete the point
- Click EDIT to change the points info or parameters
From here you can move the point to a different category by selecting the new category from the drop-down list
- When finished editing - Click Save, Update live site and Return to map